You can create three-dimensional effects in Adobe® Illustrator® using a few simple shapes. Scale a one-dimensional object and then add a bottom, sides, and shading to give it a three-dimensional look. The Illustrator Smart Guides and Pathfinder palette help you draw the object accurately.
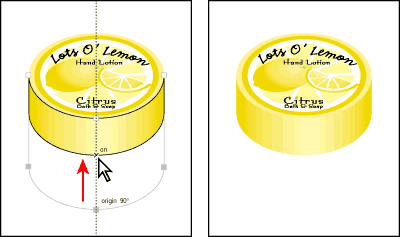
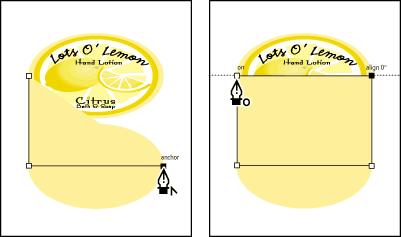
1. Create an ellipse from a circle:
Select the entire circular object. Use the selection tool to drag the center bottom handle on the bounding box up to resize the artwork vertically. Deselect the artwork.
2. Turn on Smart Guides:
Choose View > Smart Guides. Smart Guides create temporary guides that indicate paths, points, and angles. They help you select points and snap to them so that you can precisely create, edit, move, align, and transform objects. Here you'll use guides to align the shapes.
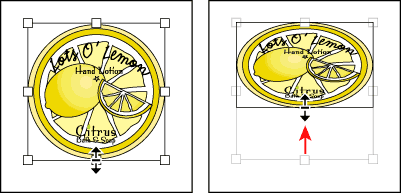
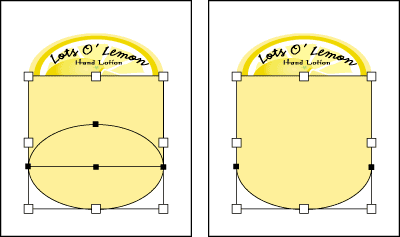
3. Create the cylinder bottom:
Select the ellipse. Start dragging the ellipse downward, and then press Option+Shift (Mac OS) or Alt+Shift (Windows) to create a copy of the ellipse and drag it below the original. Adjust the placement of the lower ellipse until the Smart Guide text indicates that it is directly below the original.
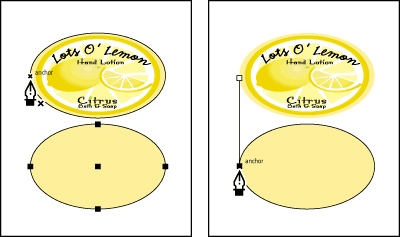
4. Create the left side of the cylinder:
Select the pen tool, and Shift-Click on the upper ellipse's left anchor point. Then click on the left anchor point on the lower ellipse, creating a line segment between the ellipses.
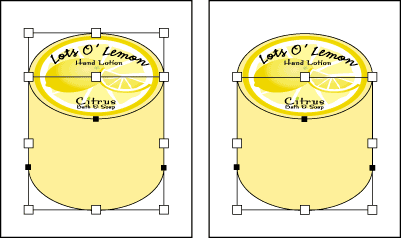
5. Complete the sides of the cylinder:
Click the right anchor point on the lower ellipse. Then click the right anchor point on the upper ellipse. Click again on the original anchor point on the left edge of the upper ellipse. You have created a rectangle that will become the barrel of the cylinder.
6. Join the barrel:
Join the barrel of the cylinder to the bottom ellipse. Choose the selection tool, and Shift-click to select both the new rectangle and the lower ellipse. Open the Align palette, click the Pathfinder tab, and click the Unite button. You now have a single object, created from the ellipse and the rectangle.
Because the upper ellipse is hidden beneath the new cylinder shape, you need to send this object to the back. Choose Object > Arrange > Send to Back.
7. Trim the barrel:
Shift-click to select both the cylinder and the upper ellipse. Click the Trim button on the Pathfinder tab of the Align palette. This removes the portion of the cylinder that overlaps the upper ellipse. Deselect the object.
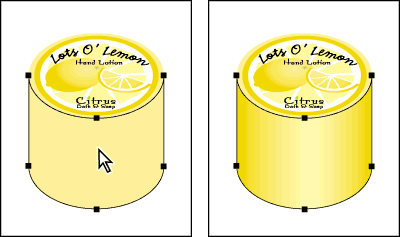
8. Create a three-dimensional effect:
Select the barrel of the cylinder with the direct selection tool. Fill the cylinder with a gradient from the Swatches palette to give it a three-dimensional look.
9. Resize the cylinder:
With the direct selection tool, Shift-click to select the left, bottom, and right anchor points of the cylinder. Hold down Shift and drag the bottom to increase or decrease the depth.